A few tips on where to put your vegetable garden.

May 14, 2020

There is a lot of interest around growing vegetables at the moment so I thought I would share with you a few tips on the best place to site your vegetable garden.

These few tips will help get you off to a great start with growing and harvesting your own food.

Your vegetable garden needs to:

Be in a Sunny spot. Vegetables need at least 6 hours of sunlight each day for best growth. If you have not got a site like this perhaps growing in pots and moving them to sunny spots may be an option.

Have Good fertile soil: You may have little choice concerning the soil type available to you, but all soils can be improved, or use raised beds, no- dig gardening or pot culture.

Be on relatively level ground: It is easier to prepare, plant, and irrigate level ground rather than sloping ground.

Be well-drained: Ideal but not always possible. This can be overcome with soil improvement or raised beds.

Be close to a water source: Ideally easily reached with a garden hose.

Be free from the root competition of trees and large shrubs:  Again, not always in your control if it is the neighbour’s trees that are the problem. Try digging a narrow 60cm trench on the edge of your property and lining it with a geotextile fabric, deigned to stop tree root invasion or build a raised bed and line it in the same material.

Sheltered from strong winds: If this is a problem consider planting a windbreak to shelter your vegetable garden, while you are waiting for it to grow build a frame and cover with shade cloth and place it on the side of the veggie garden where the damaging winds are coming from.

 Be close to your house: You are more likely to spend time working in your garden if you can reach it easily; it is also easier to run out and pick stuff for dinner.

Be protected from birds, domestic and feral animals: These can be one of your biggest problems when trying to protect your crop. A fully enclosed area will ensure protection from all animals and birds, but can be expensive.

A fence is a cheaper option, giving some protection from animals but not birds. But it also gives you extra vertical space as it can serve as a trellis for beans, peas, tomatoes, and other crops that need support.

This is an extract from a E pamphlet I have developed on growing annual vegetables, here is the link if you found this information helpful.

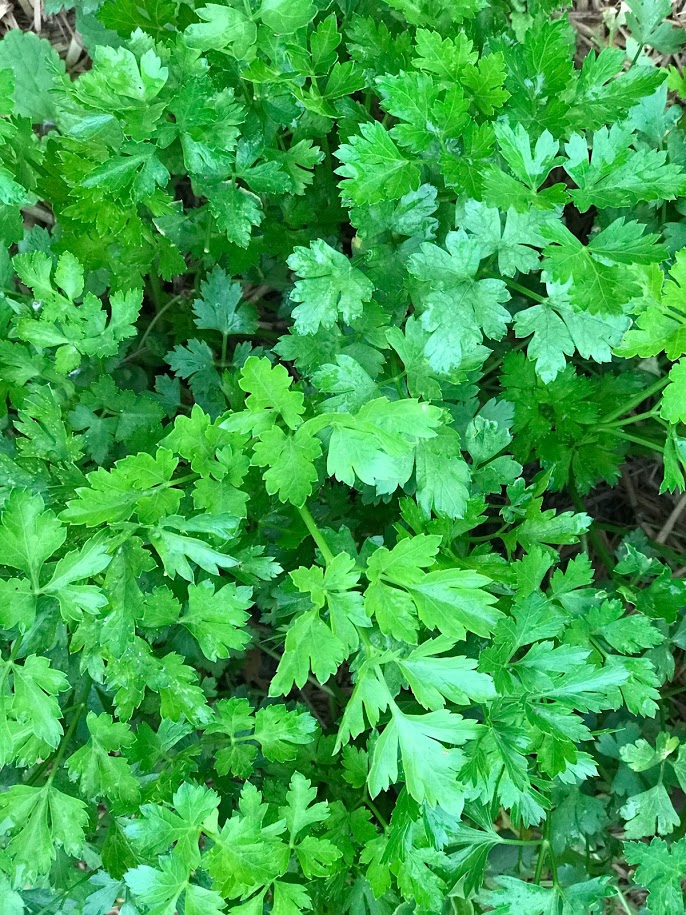
Parsley (Petroselinum crispum). It is a fabulous herb
full of nutrients and flavour and very easy to grow all year.

There are two main
types: Italian flat leaf (continental) parsley and curly leaf parsley. Flat
leaf parsley is by far my favourite, with its softer texture and almost peppery
flavour I love to use it fresh and in cooking.

It is the one herb I use just about every day whether on my
morning breakfast eggs, added to a salad, soup or stew or scattered over my
favourite pasta or curry, I always seem to be able to find ways to use it.

Here is how I grow parsley all year so that I always have it
available.

How to grow
Parsley.

It
is a biennial growing one year and sending up a flower stalk in the following year,
so I like to plant new plants every year.

Parsley is
a warm season plant and grow best between 20–30°C. Whilst it will survive at lower
temperatures is growth is very slow.

It likes
full sun but in hot weather (over 35 oC) a bit of protection is needed.

Like
most herbs they like well drained fertile soil with a soil pH of around 6.5.

Ideal
for container production. Use a pot of at least a 200mm and good quality
potting mix. Be extra diligent about watering and fertilising, especially
during hot and windy conditions, to maintain plenty of healthy growth.

Whilst
parsley will grow quite easily from seed, they take a long time to germinate (it
can be up to 6 weeks) and I am not very patient, so I usually just buy
seedlings to plant out.

I do three plantings a year. At the beginning
of spring, the beginning of summer and mid-autumn. The spring planting go into
the vegetable garden in full sun, the summer planting into an area with
afternoon shade and the mid- autumn planting are planted into pots so I can put
them in a nice warm protected area during winter. This ensures year-round
production.

Even
though I let some plants go to seed they do not seem to self-seed around the
garden like many people in warmer climates report happening. 

They require the usual maintenance of plenty of water and fertilising
with a high nitrogen liquid fertiliser once a week to get lots of growth so you
can be harvesting bunches of parsley all year.

When harvesting always pull the whole leaf away from the base of
the plant rather than just cutting or picking the leafy top as leaving a leaf
stub can cause the base of the plant to rot in warmer weather.

As I can usually get year-round production I don’t always dry
excess leaves but it is worth doing to have some in the cupboard as it is far
superior in flavour to anything you can buy.

So why not pop some parsley plants into your garden this week and
enjoy not only the taste but the nutritional benefits of this wonderful herb.

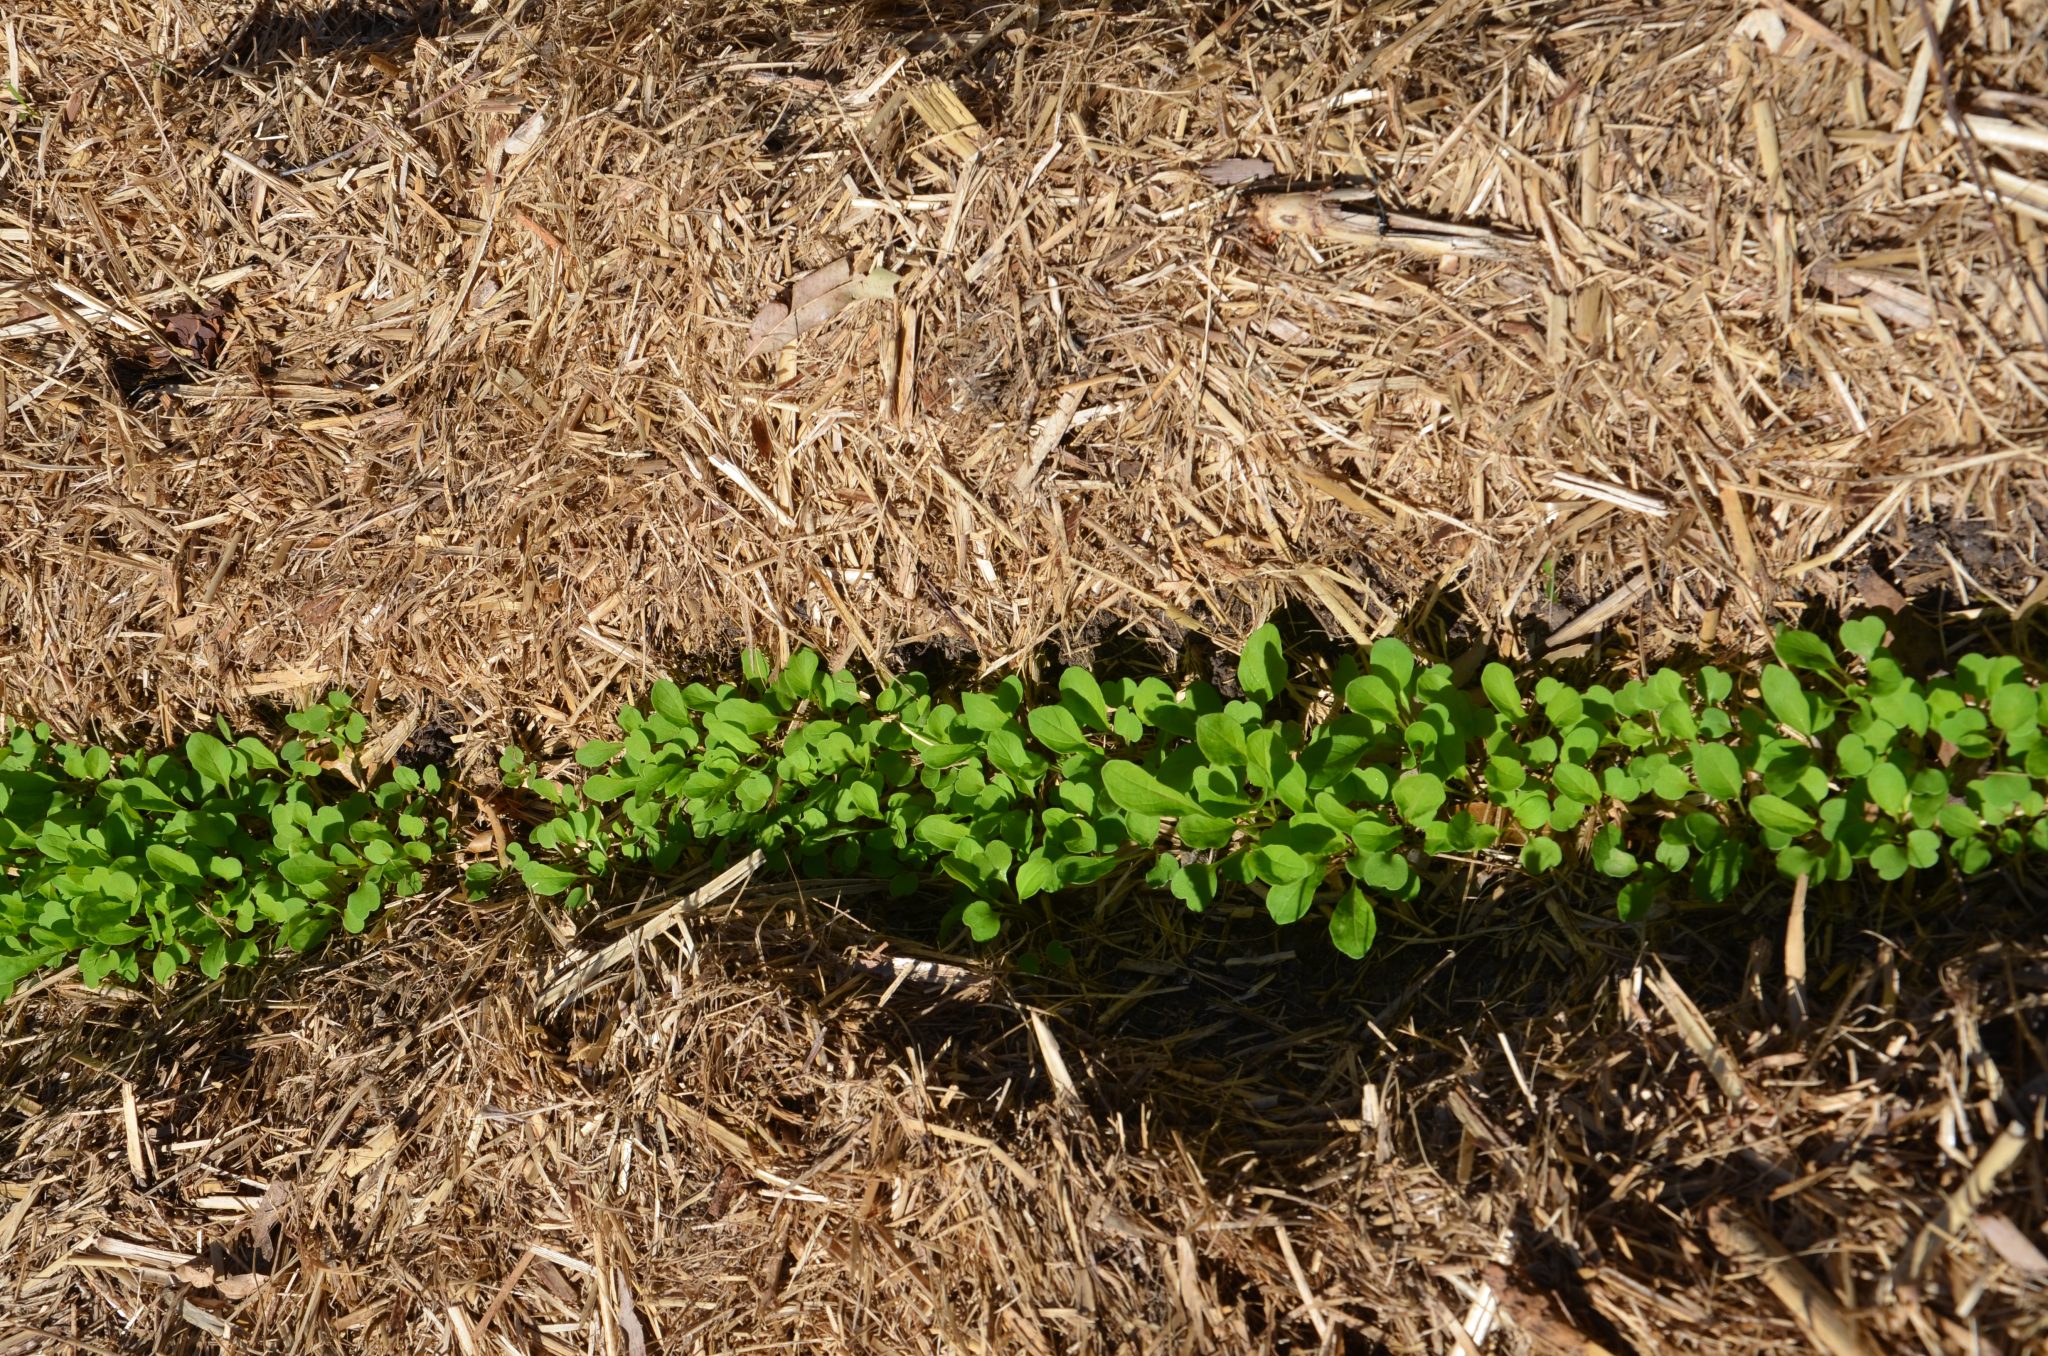
So, what is Mesclun? according to https://en.wikipedia.org Mesclum (French pronunciation: [mɛsˈklœ̃]) is a mix of assorted small young salad greens that originated in Provence, France.

I use mixed young leaves constantly, and in great quantity in salads, on sandwiches and as wilted greens. I dislike buying them as they are either wilted and dry looking if sold loose or often slimy if sold as a bagged product. Bought leaves also seem to lack any flavour.

Therefore, I need to keep a continual supply growing in my garden all year.

The mix can vary during the year.
In spring summer and autumn, the bulk of the mix will be open leafed lettuce varieties with rocket, coriander and young beetroot and silverbeet leaves added to complement these.
Whereas in winter there will be more rocket and coriander with the addition of young English spinach, beetroot and kale leaves.

You can put whatever you like in the mix and it will vary depending on what climate you are growing in and the time of year.

Over the many years of growing theses mixes, I have discovered a few tips that ensure I have a ready supply of mixed leaves all the time and thought I would share these with you.

Tip 1. Plant by seed and in situ (where they are to grow). This is by far the quickest and cheapest way to keep a good supply of leaves available, but purchasing seedlings can also work. All the leaf varieties l I mentioned above are easy to germinate, just prepare an area of soil, scatter seed over the prepared ground, cover with seed raising mix and keep moist.
There is no need to worry about spacing as they can be planted quite thickly and then cut as baby leaf after three to four weeks.
Also let some plants go to flower and set seed so they self-seed around your garden ensuring a continual supply.
If you want a more in-depth guide to starting plants from seed check out my ebook at http://www.myproductivebackyard.com.au/product/the-annual-vegetable-garden-module-2/,


Tip 2. Successive planting. I have written about successive planting before for other varieties of vegetables and herbs, so it will be no surprise to those of you who read my blog to know I do this for my mixed leaves as well. To ensure a have a continual supply of leaves I try and plant a 20cm to 30cm row of mixed seeds every two to three weeks most of the year and in the summer months when I am more likely to eat more salads, perhaps this amount every week.
Why not download my free infographic about succession planting? Here is the link http://www.myproductivebackyard.com.au/product/free-download-harvest-food-all-the-time-with-successive-planting/

Tip 3. Keep moist. Water stress is one of the main reasons for leaves becoming bitter or bolting to flower so keep your young plants well-watered. If the area you are planting them in has a tendency to dry out, increase its moisture holding capacity in the long term by adding well composted organic matter to increase the humus content of the soil and for a short-term solution apply a soil wetting agent.
Fertilise for leaf growth. For all the leafy plants I have mentioned, what we are trying to produce is an abundance of leaf growth. So, you need to keep them actively growing. To do this prepare the soil they are to be planted in with a fertiliser with a high nitrogen ratio, such as pelletised poultry fertiliser. Once germinated and they have about four true leaves, feed them twice a week with a half-strength high nitrogen liquid fertiliser such as Powerfeed or a fertiliser tea made from a material such as poultry manure, green leafy weeds or chopped up legumes.

Tip 4. Keep cool. Although most lettuce and other leafy plants I use in my mix love full sun they will bolt in hot weather, so in summer I plant them in a slightly shaded spot that avoids hot afternoon sun or plant in between larger plants such as corm that will shade them. If this is not possible, try planting them in pots that can be moved into a cooler spot if hot weather is predicted.

So if you use a lot of mixed leaf salad leaves, why not try following these few easy tips and hopefully this year you will have a continual supply of mesclun in your garden that can be picked and eaten fresh whenever you want it.

Happy Gardening Kathy


I ask a lot from my vegetable garden.

As soon as I remove a crop, I am replanting something back into that space. This allows me to make the most of the space  I have and to achieve a great harvest all year long.

However, this continual production depletes the soil of nutrients, so I am continually applying fertiliser to replenish the soil.

How I do this? As soon as I have removed a plant or several plants, I spread an organic general-purpose fertiliser over the area, water it in and mulch. Then the ground is ready for planting up with seeds or seedlings. This is a continual process.

I like to use organic fertilisers. They break down slowly, gradually releasing nutrients to my plants over a long period. When organic fertilisers break down slowly, plants can take up the nutrients as they become available.

The benefits of using organic fertilisers are:
• Plants always have the nutrients they need to grow and produce
• You do not have to fertilise as often
• There is no leaching of excess nutrients into groundwater and local waterways, making them good for the environment

What do I use?
For many years I would go to the trouble of gathering a range of bagged products together to try and produce a mix that had a wide range of nutrients. I needed a mix that would provide everything my plants needed to grow, be healthy and resilient and produce plenty of fruit and vegetables.

I mainly mixed up chicken manure and blood and bone, which are full of nitrogen to support leaf growth. Then add fish emulsion and seaweed extracts, plus potash to add phosphorous and potassium to support flowers and fruiting. Potassium is also needed for the general good health of a plant as well as helping develop a good root system. Then I would add rock dust to make sure I had plenty of minerals and trace elements.

This was obviously a lot of work and the trouble is with organic manures is that you can never be sure of their specific nutrient content.

So, when I saw a Katek product called Super Growth which contained all the ingredients I usually put into my mix but with a scientific analysis telling me the nutrient breakdown, I started to use it with great results.

I recommended their product here on my blog some years ago and I am still using it and getting great results.

With a nutrient ratio of N 3.5 % P 1.9% K 4% plus calcium and other trace elements, it is proving to be a very good fertiliser for my vegetable garden.

It is particularly good for plants like broccoli, cauliflower, capsicum, peas and beans and tomatoes that all benefit from enough nitrogen to produce good healthy plants but not too much that you get all plant and no flowers and fruit.

Then there are adequate amounts of potassium and phosphorous available to support good head production in the brassicas and flowers and fruit in my fruiting vegetables.

So, if you are looking for a ready mixed product to use on your vegetables why not try Katek’s Super Growth. I am sure you will get great results like I have and get a great harvest from your productive backyard.


This post has been sponsored by Katek. I was financially compensated and given the product to review. However, the opinions expressed are my own based on my experiences of using the product over several years.

Happy Gardening Kathy

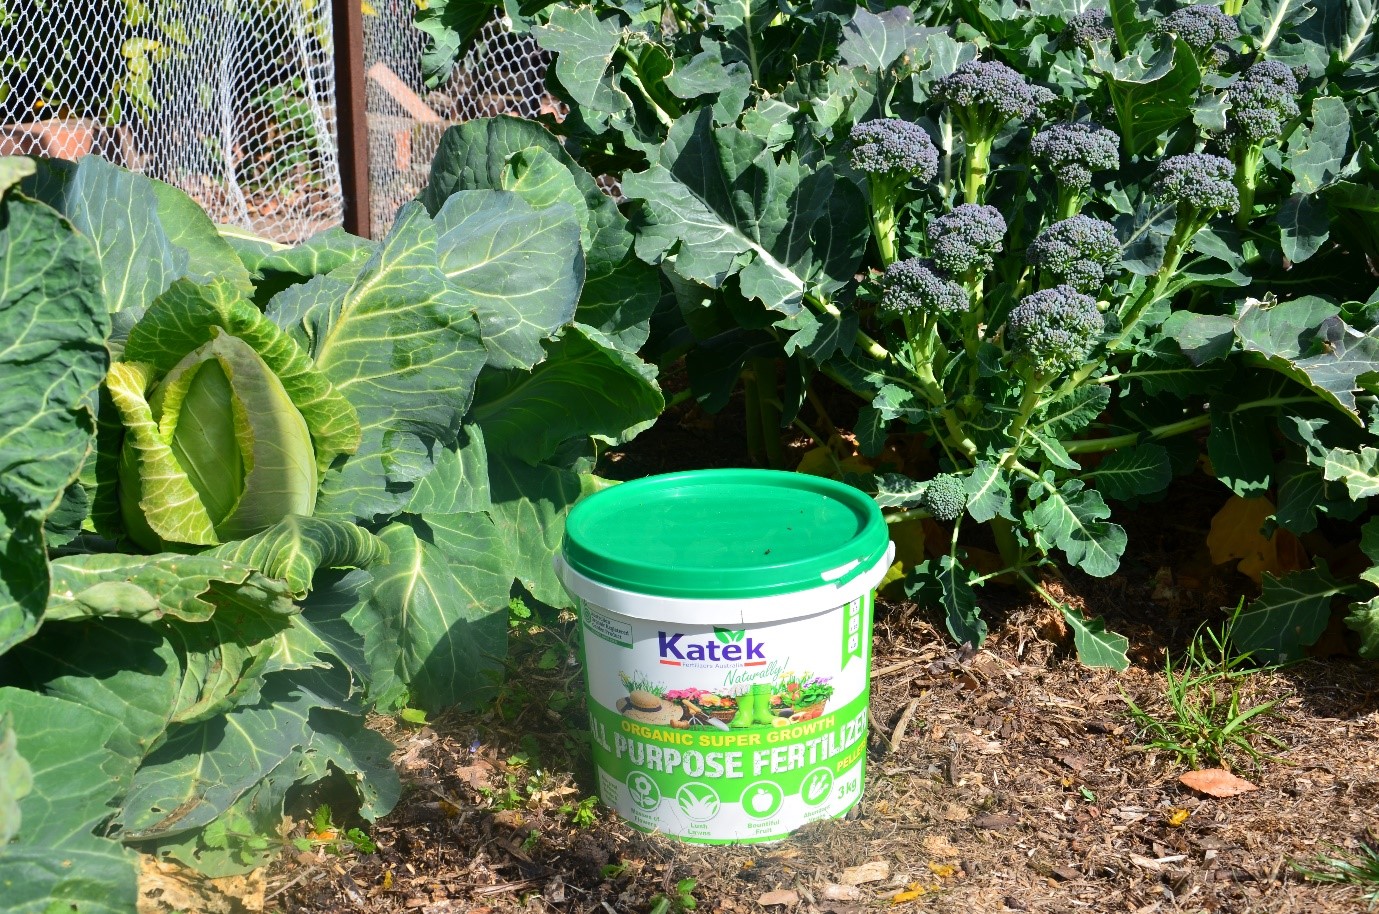
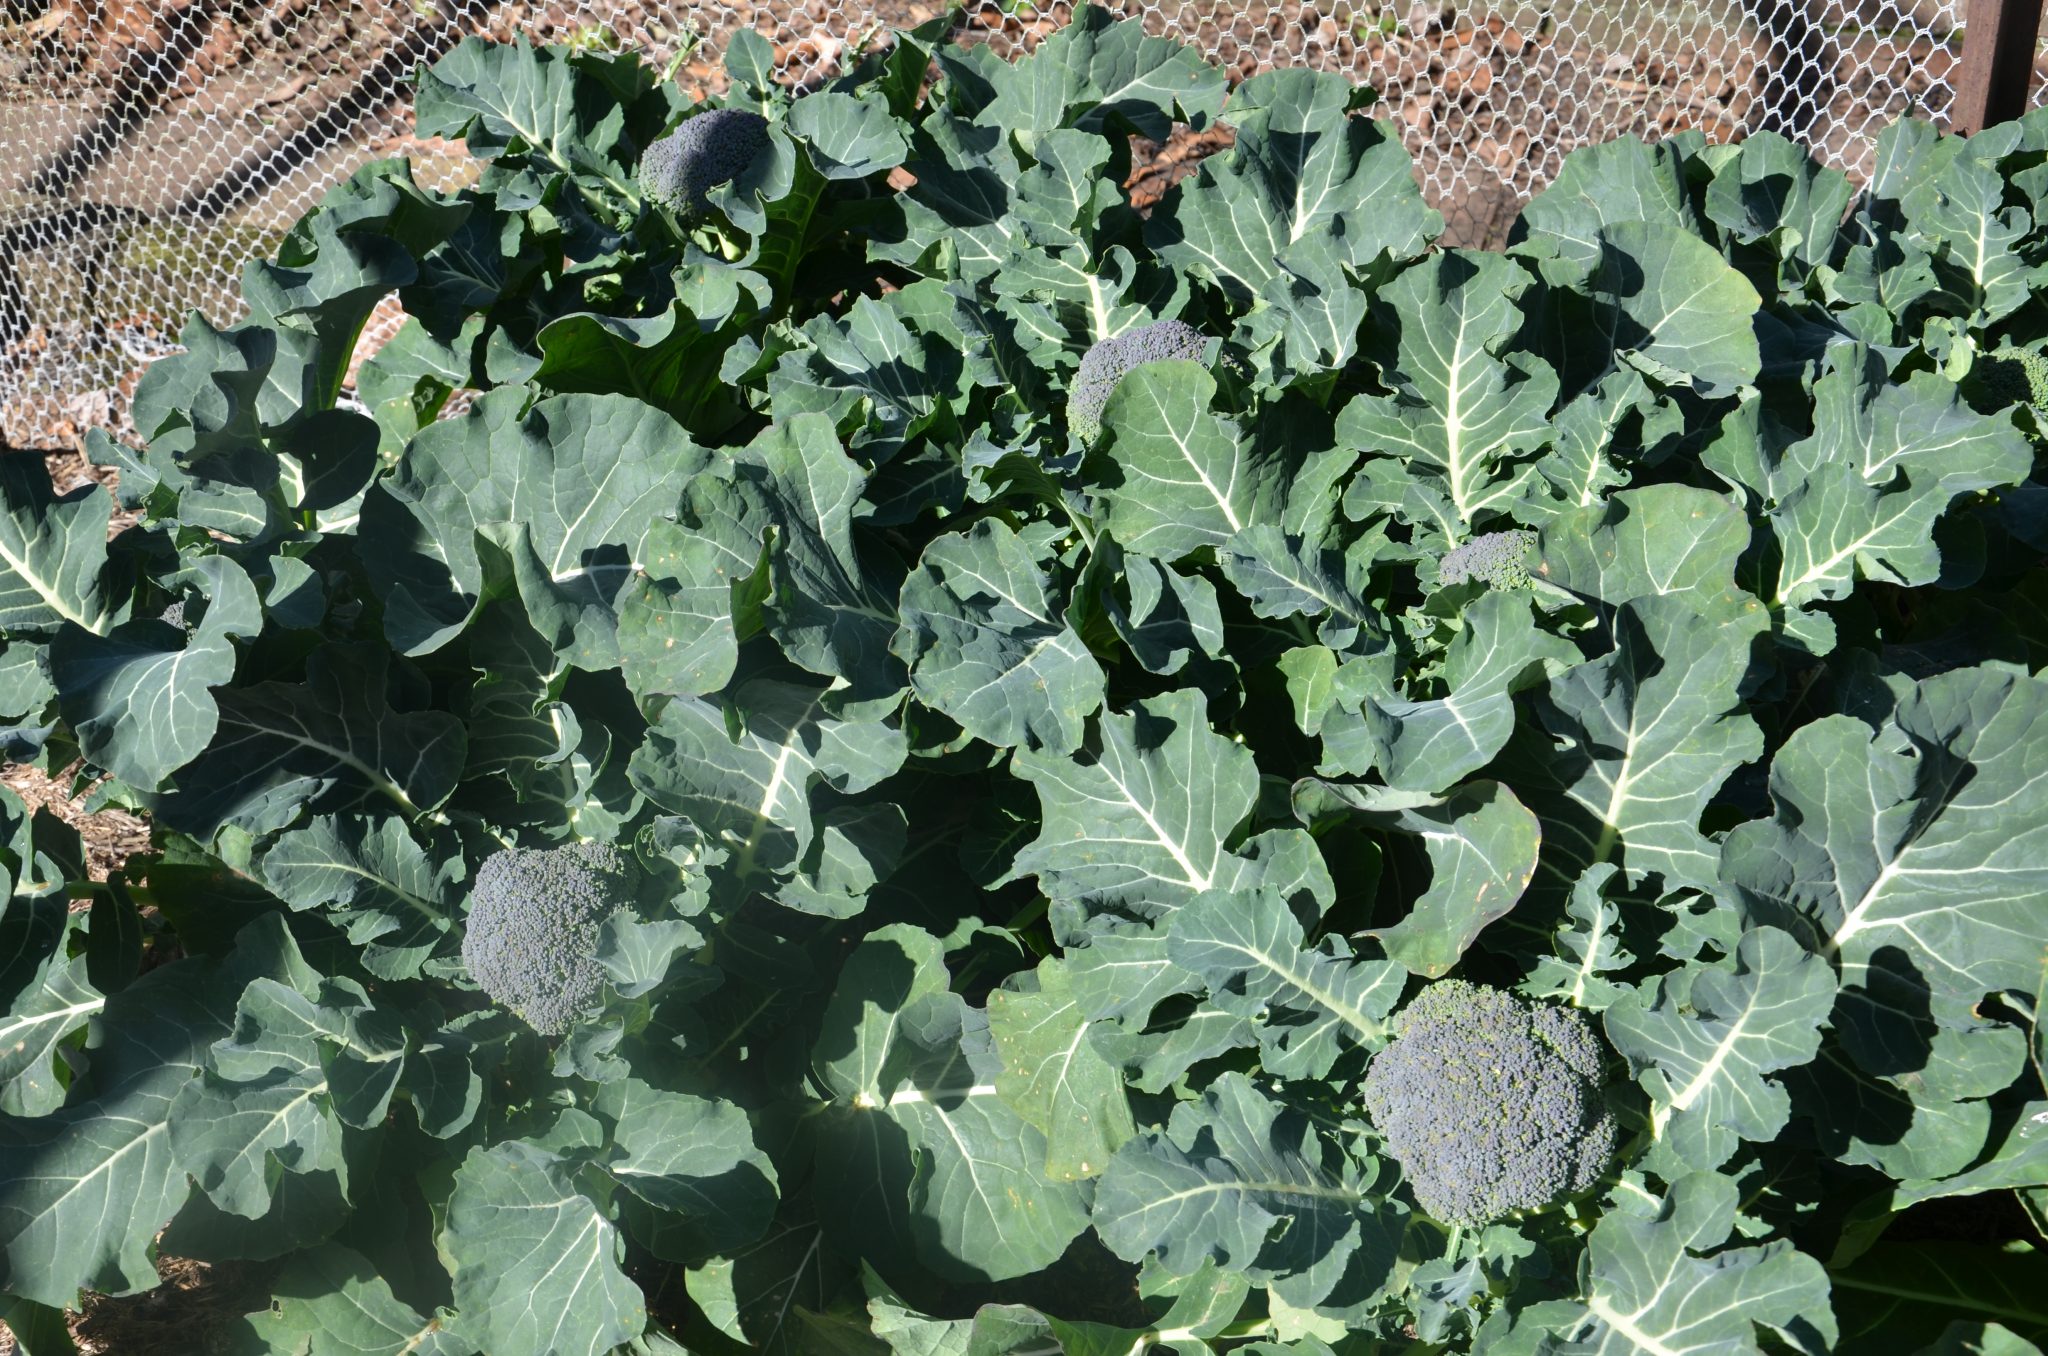
I like to have one or two dependable vegetables in the garden all year.

Those veggies you can put in, take very little care and yet they will always give you a great harvest.

For me my top dependable is Broccoli. I don’t know if it is my soil, the position of the garden or that I am I am in a cool climate or a combination of things, but I am able to grow it all year.

I regularly plant (about once a month) 6 to 12 plants. I use a no-dig system, which I top up with an organic all-purpose fertiliser and sugar cane mulch. I will give the seedlings a couple of liquid feeds of a high nitrogen fertiliser, such as a tea made from chook manure, to help get them established and growing well and that about all I do until harvest time.

I rarely water them, only in the height of summer and have very little problem with pests.

Yet they always develop into lovely healthy plants, produce good sized initial heads and then produce lots of side shoot for weeks after.

This gives me enough broccoli to have several feeds a week and plenty to give to friends and family.

It is a vegetable that is so reliable that if I have nothing else in the garden I can always pick enough broccoli for a feed.

Every garden needs at least one dependable veg growing in it for those times in between seasonal harvests or when you have miss-timed plantings and have nothing else to harvest.

So how to find that Mr Dependable Veg for your garden.

Firstly

Look at what you and your family like to eat. What are the two or three vegetables you can eat several times a week and still enjoy?

Also, experiment- every garden is different.

Grow lots of different things at different times of the year, don’t be tied to regional grow charts or what is available in punnets.

Don’t be too fussy with them- prepare your soil well, water to establish and liquid feed occasionally and see what thrives.

If you have had success with something try planting it on and off all year and see what happens.

Record your results-

What did the family enjoy eating the most?

What was the easiest thing to grow? (ie what needed the least amount of care, was not bothered by pest and disease and gave a consistently good harvest).

What was able to thrive all year?

After a couple of seasons, you will know which vegetable or vegetables will become your Mr Dependables.

Then it is simply a matter of planting them regularly, so you always have then growing in your garden.

For me, in a cool climate, my top three dependable vegetables are Broccoli, Carrots and Rocket.

Hope you have success in finding yours.

Happy Gardening Kathy


I use mulch everywhere in the garden. In the vegetable garden, the orchard, the cutting garden and ornamental areas.

What is mulch- It is anything that covers the soil and excludes light. It is usually some form of organic matter, but it can also be inorganic, such as stones or pebbles. Stones are only suitable for permanent easy-care gardens, for annual plantings such as in the vegetable garden I like to use an organic matter that will break down quickly.

Why do I use mulch?
 It adds organic matter which keeps the soil full of life and nice and healthy. All organic matter will break down to release nutrients into the soil and increase the humus content of a soil.

 It retains moisture by creating a barrier to evaporation. You must make sure the area is moist before putting it down so water well or apply after good soaking rain.

 It acts as insulation blanket keeping soil cooler in summer and warmer in winter- though in a cool climate it can prevent soil warming up in spring which can delay spring planting. But this is easily overcome by scaping it back for a few weeks at the end of winter exposing the soil to a few weeks of warm weather and then planting up and replacing the mulch.

 But my main reason for using mulch is to prevent weed germination. Both weed seed in the ground or stray weeds that either fly in or are dropped by birds and animals. Mulching will not prevent the growth of persistent weeds like oxalis and onion weed or runner grasses like couch and Kikuyu

Weeding any type of garden can be soul destroying activity and can consume a lot of time that is better utilised planting, harvesting and eating your produce.

Weeds are designed to germinate, grow quickly and stabilise any bare ground- it is natures way of preventing soil erosion. So, if you have exposed soil it will soon be overrun with weeds.

The secret to weed control is to never leave soil bare and exposed.
Always cover it with mulch or groundcover plants.

In any type of planting there will always be some gaps, as all plants need room to grow and mature. By applying a layer of mulch to the area around all plants you will be coving up any bare ground which will cut out light to weed seeds in the soil and stop seeds that land on top of the mulch from accessing the soil thus preventing them from germinating.

You need to apply your mulch at least 10cm thick for this to occur.

Generally, quick decomposing mulches, such as sugar cane waste, need to be reapplied annually and heavy-duty wood chip type mulches every two to three years.

One of the greatest disappointment I can have is to purchase and apply a mulch that is full of weed seed.

In the past this seemed to occur regularly when I was buying Lucerne hay or straw and the dreaded pea mulch that would have hundreds of field peas germinate in it. Now both Lucerne and pea mulch, being legumes, add nitrogen to the soil and create a lovely humusy soil very quickly. Field peas germinating in your vegetable garden can also be a good companion plant, but they just grow very quickly and tend to smother anything they are planted with, it’s a shame they can’t be eaten.

I have certainly introduced some horribly aggressive weeds by using these products, some I am still fighting 20 years on. As a result, I am very cautious about buying them.

When I started using sugar cane mulch in the annual vegetable garden I discovered that I have had very little, if any, weed issues with it. As a result, it is my go-to mulch for all annual plantings.

I did however have a lapse in conviction (or perhaps it was my tight valve) when I came across some bales of cheap pea mulch which the vendor said would not grow peas because it has been cut up finely – great I say and purchase 10 bales- it was cheap.

So, you can imagine my disappointment when a couple weeks after applying it the entire bed is full of germinating seeds, Ryegrass, wheat seed and several other things I do not recognise. These are all growing at an alarming rate and even though the chooks are loving them I still must take the time and effort to remove them from the beds so they do not out compete my vegetables. No peas seeds germinated, so the vendor was being truthful, but I expect it was cheap due to weed issue.


In the orchard and ornamental garden, I use wood chip mostly from tree loppers who are doing tree pruning in the area. It mostly contains mixed tree waste consisting of native eucalyptus wattles and the occasional conifer. However, a few years ago I got a load that was full of chopped up willow. Willows have what are referred to as preformed roots under the bark so every piece small piece of willow, and there were thousands, grew roots and started growing. I am still pulling out rouge willows that have taken root all over the garden.

So my advice to all time-poor gardeners or those of you that would rather spend your time doing growing plants than removing weeds is to be cautious of any organic matter you bring into your garden. Find a mulch that is weed free and stick to it.
Much is a wonderful addition to any garden saving you time and allowing you to put your efforts into more productive pursuits but only if it is weed free.

Happy Gardening Kathy

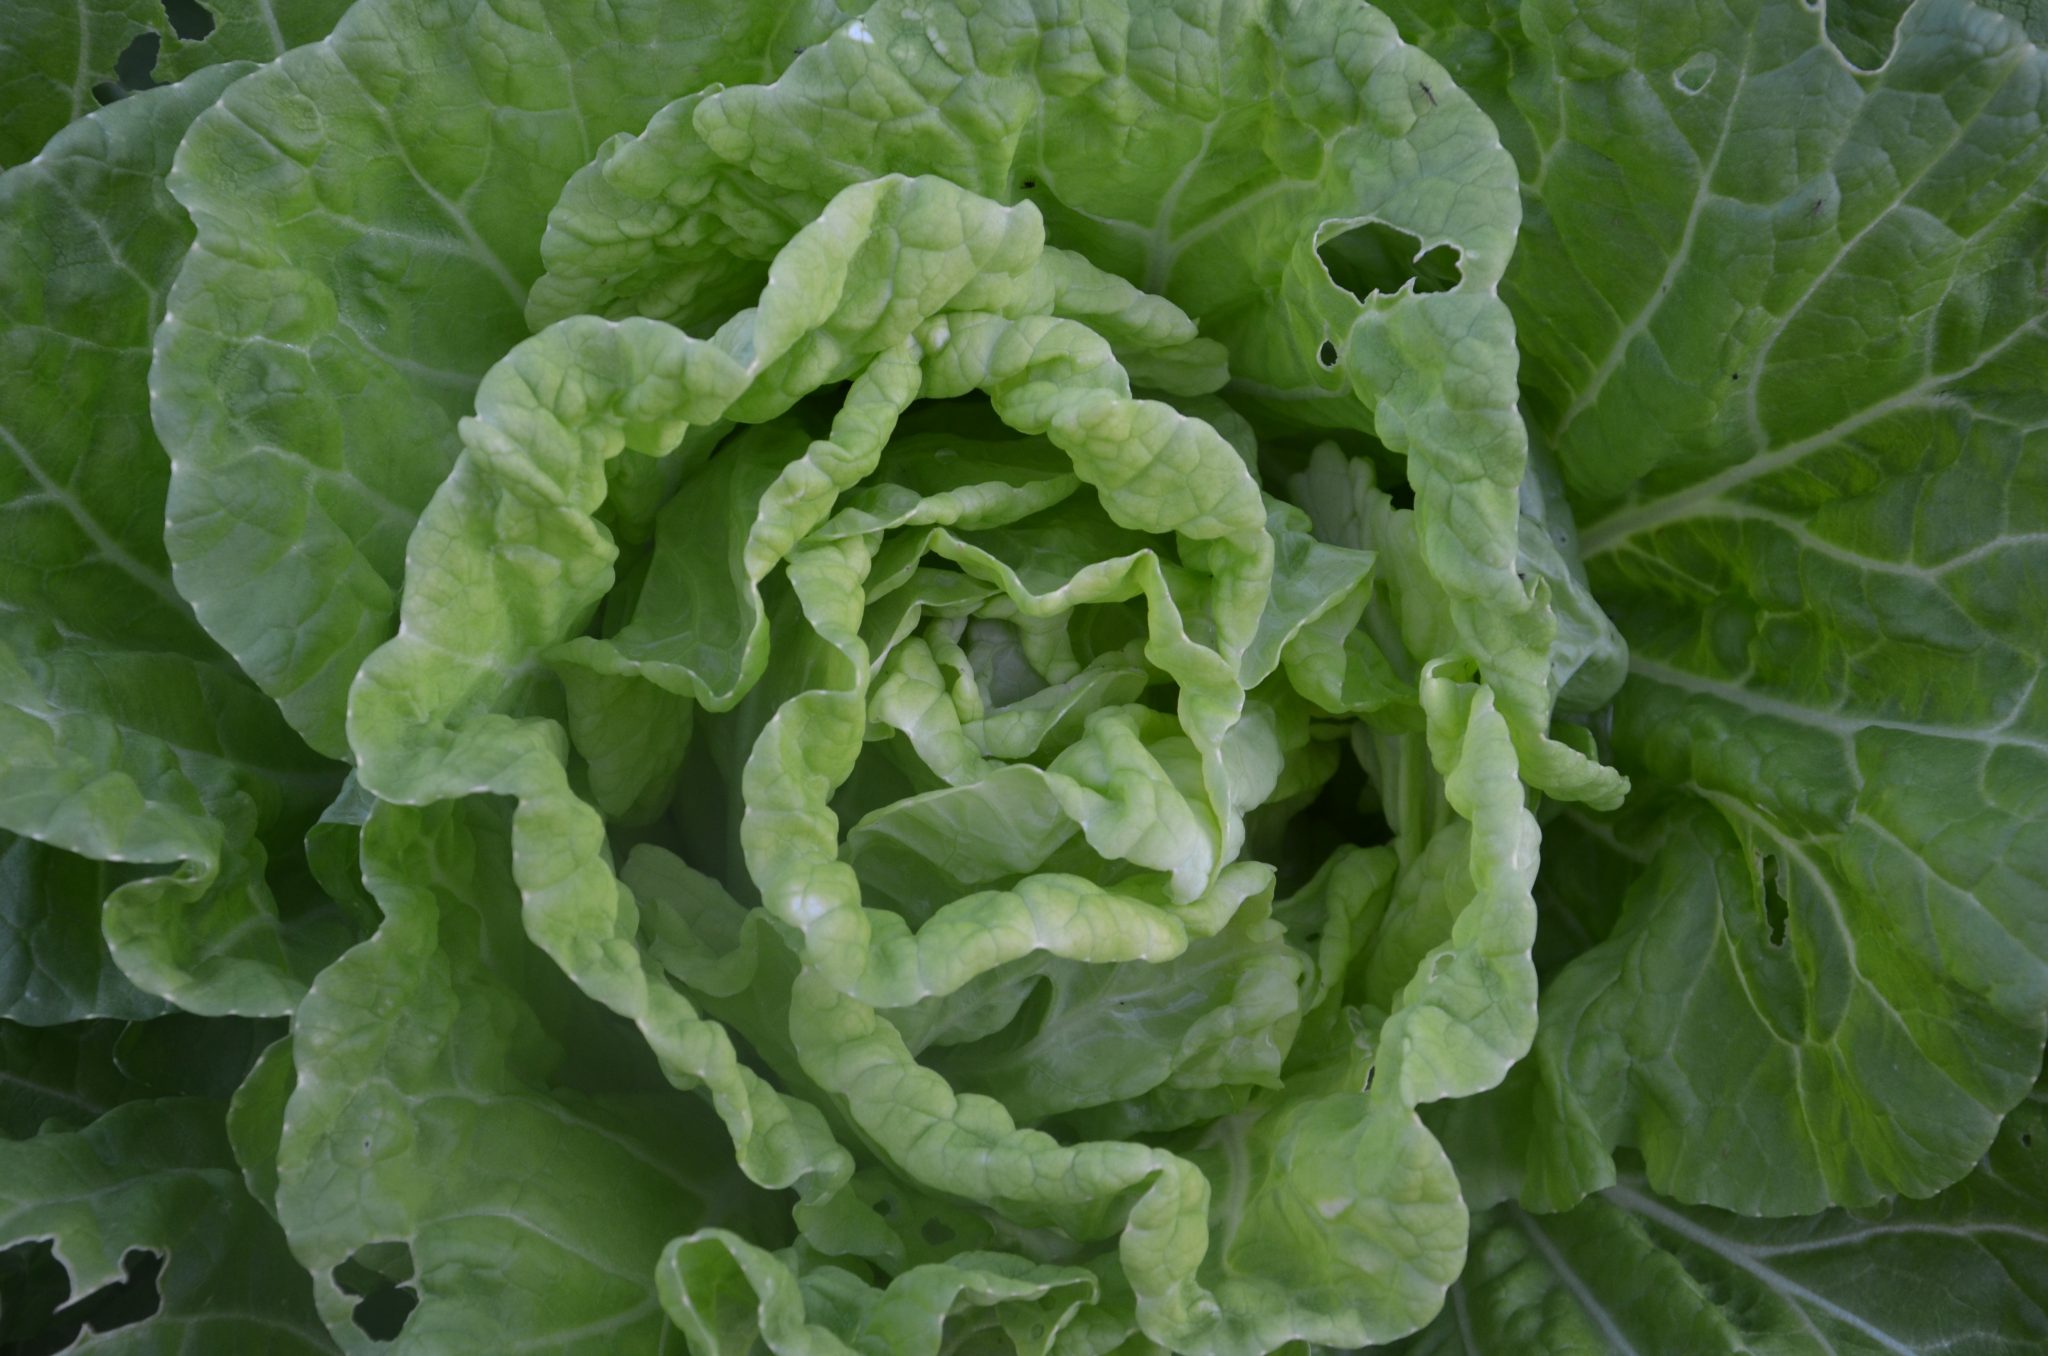
Chinese cabbage or Wombok (Brassica rapa subsp. pekinensis) is a wonderful cool season crop.

It is the perfect late summer/autumn crop as they prefer warmish temperatures of around 18- 20 to become established and grow. They will start to form a head as soon as the temperature drops to an average of 14- 16 degrees with final head formation occurring with a further drop in temperature (10-13).

Along the east coast, the ideal time for growing Chinese cabbage is mid to late autumn and harvesting in winter whereas in the here in the highlands I will plant a few seeds every week from mid-March through to early May. As they are a quick crop, maturing in 8-10 weeks, I will be harvesting from late May through to mid-July. Seedlings do not grow well in cold temperatures so once we start getting regular frost I stop putting them in.

As they are such quick growers I can harvest and use them long before my European cabbages are ready. I like to harvest them when the heads are firm but not hard like a European cabbage.

Chinese cabbage, being a brassica, are very good for you. They are a good source of calcium, iron, phosphorus and vitamins A and C., they are also high in glucosinolates.

Womboks can be used in similar ways to traditional cabbage though I find that they have a slightly sweeter flavour and are somewhat milder than European cabbage. The outer leaves are softer and taster than those on traditional cabbage and the inner leaves are very tender and sweet.


So, whilst I use wombok in stir-fries and soups my favourite dish is eating it raw in an Asian style coleslaw. Its sweet flavour and crunchy texture is also ideal for shredding on to a sandwich or a wrap.


This year I have also started making the Korean pickle Kim Chi which is adding to my store cupboard nicely.


Chinese cabbage is such a great quick cool season crop to grow so why not pop some in this week and you will soon be introduced to the joys of this versatile vegetable.


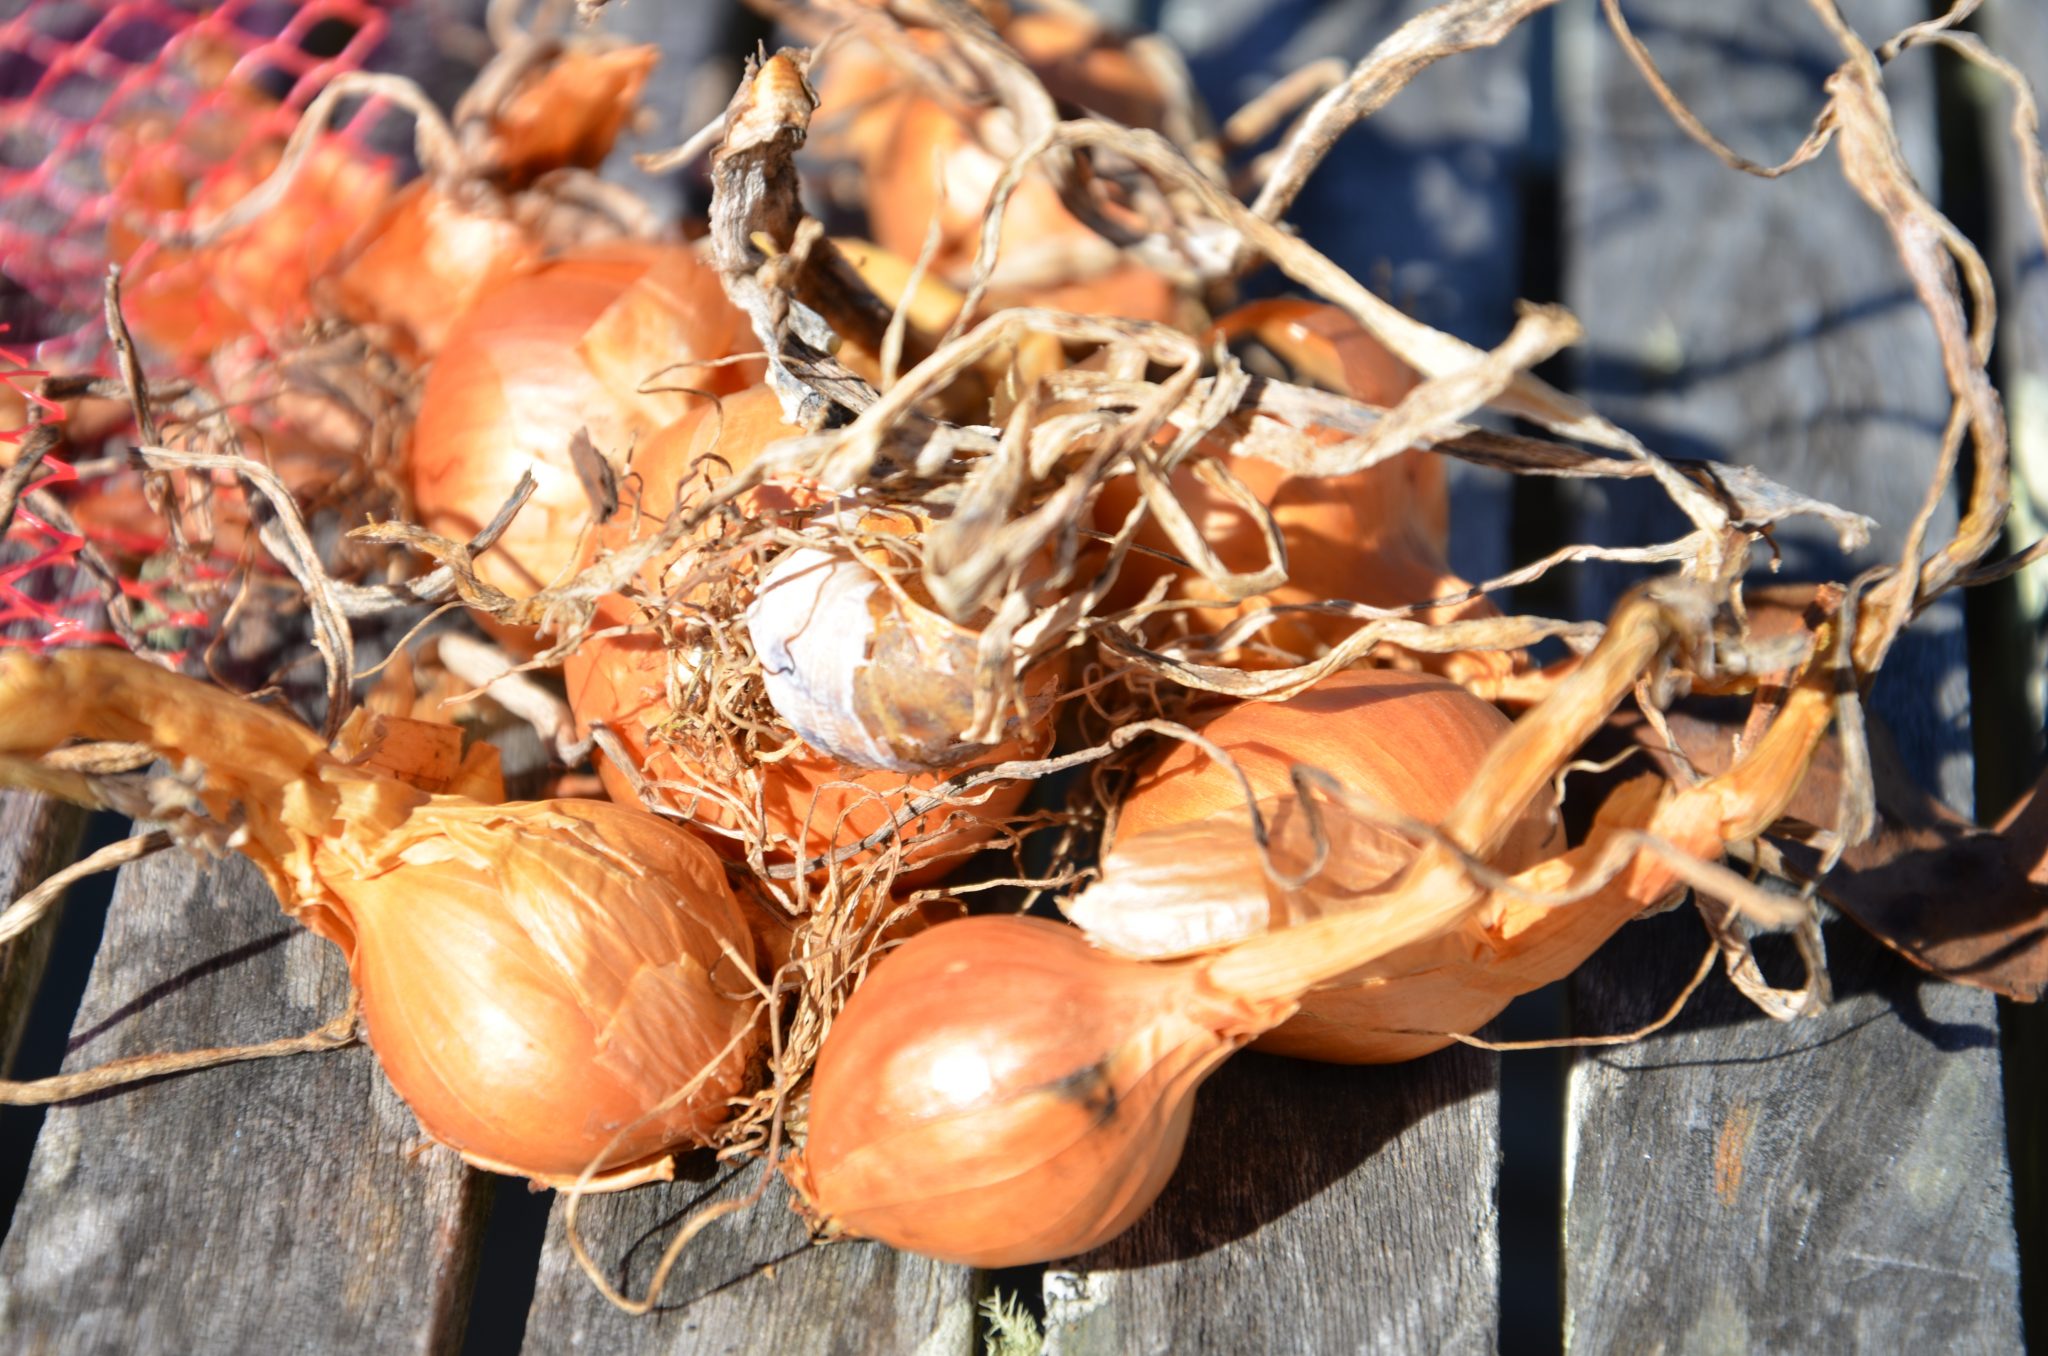
Golden Shallots

Whilst we have had some cool morning in the past week, the days have been quite warm.
This type of weather always lulls me into a false sense of security and I start wanting to plant some warm season crops such as beans and carrots- but the ground is still too cold for these to germinate so I have to be patient.

I will be putting in a small patch of rocket and coriander this week to maintain my continual supply as well as a few Cos lettuce seedlings.

I also came across a bag of golden shallots from last season’s harvest that I did not realise were still in storage. I will use probably half in the kitchen but plant the rest.

They have become a staple in my kitchen as I love their subtle taste in cooking. This means I am using them more and more so need to plant plenty so I have enough to see me through the year.

They really should have been planted in June but I will put them in and see how they go. They will grow alright but the resulting bulbs may be a bit small. This is not a problem as any small ones I either keep for planting out next year or pickle them. They are quite delicious pickled, somewhat milder than onions, and fabulous with a ploughman’s lunch or mezzie platter.

So if you can find some to plant, either from a nursery or a green grocer, why not pop some in. They love the same conditions as onions and require very little care.

Happy Gardening Kathy

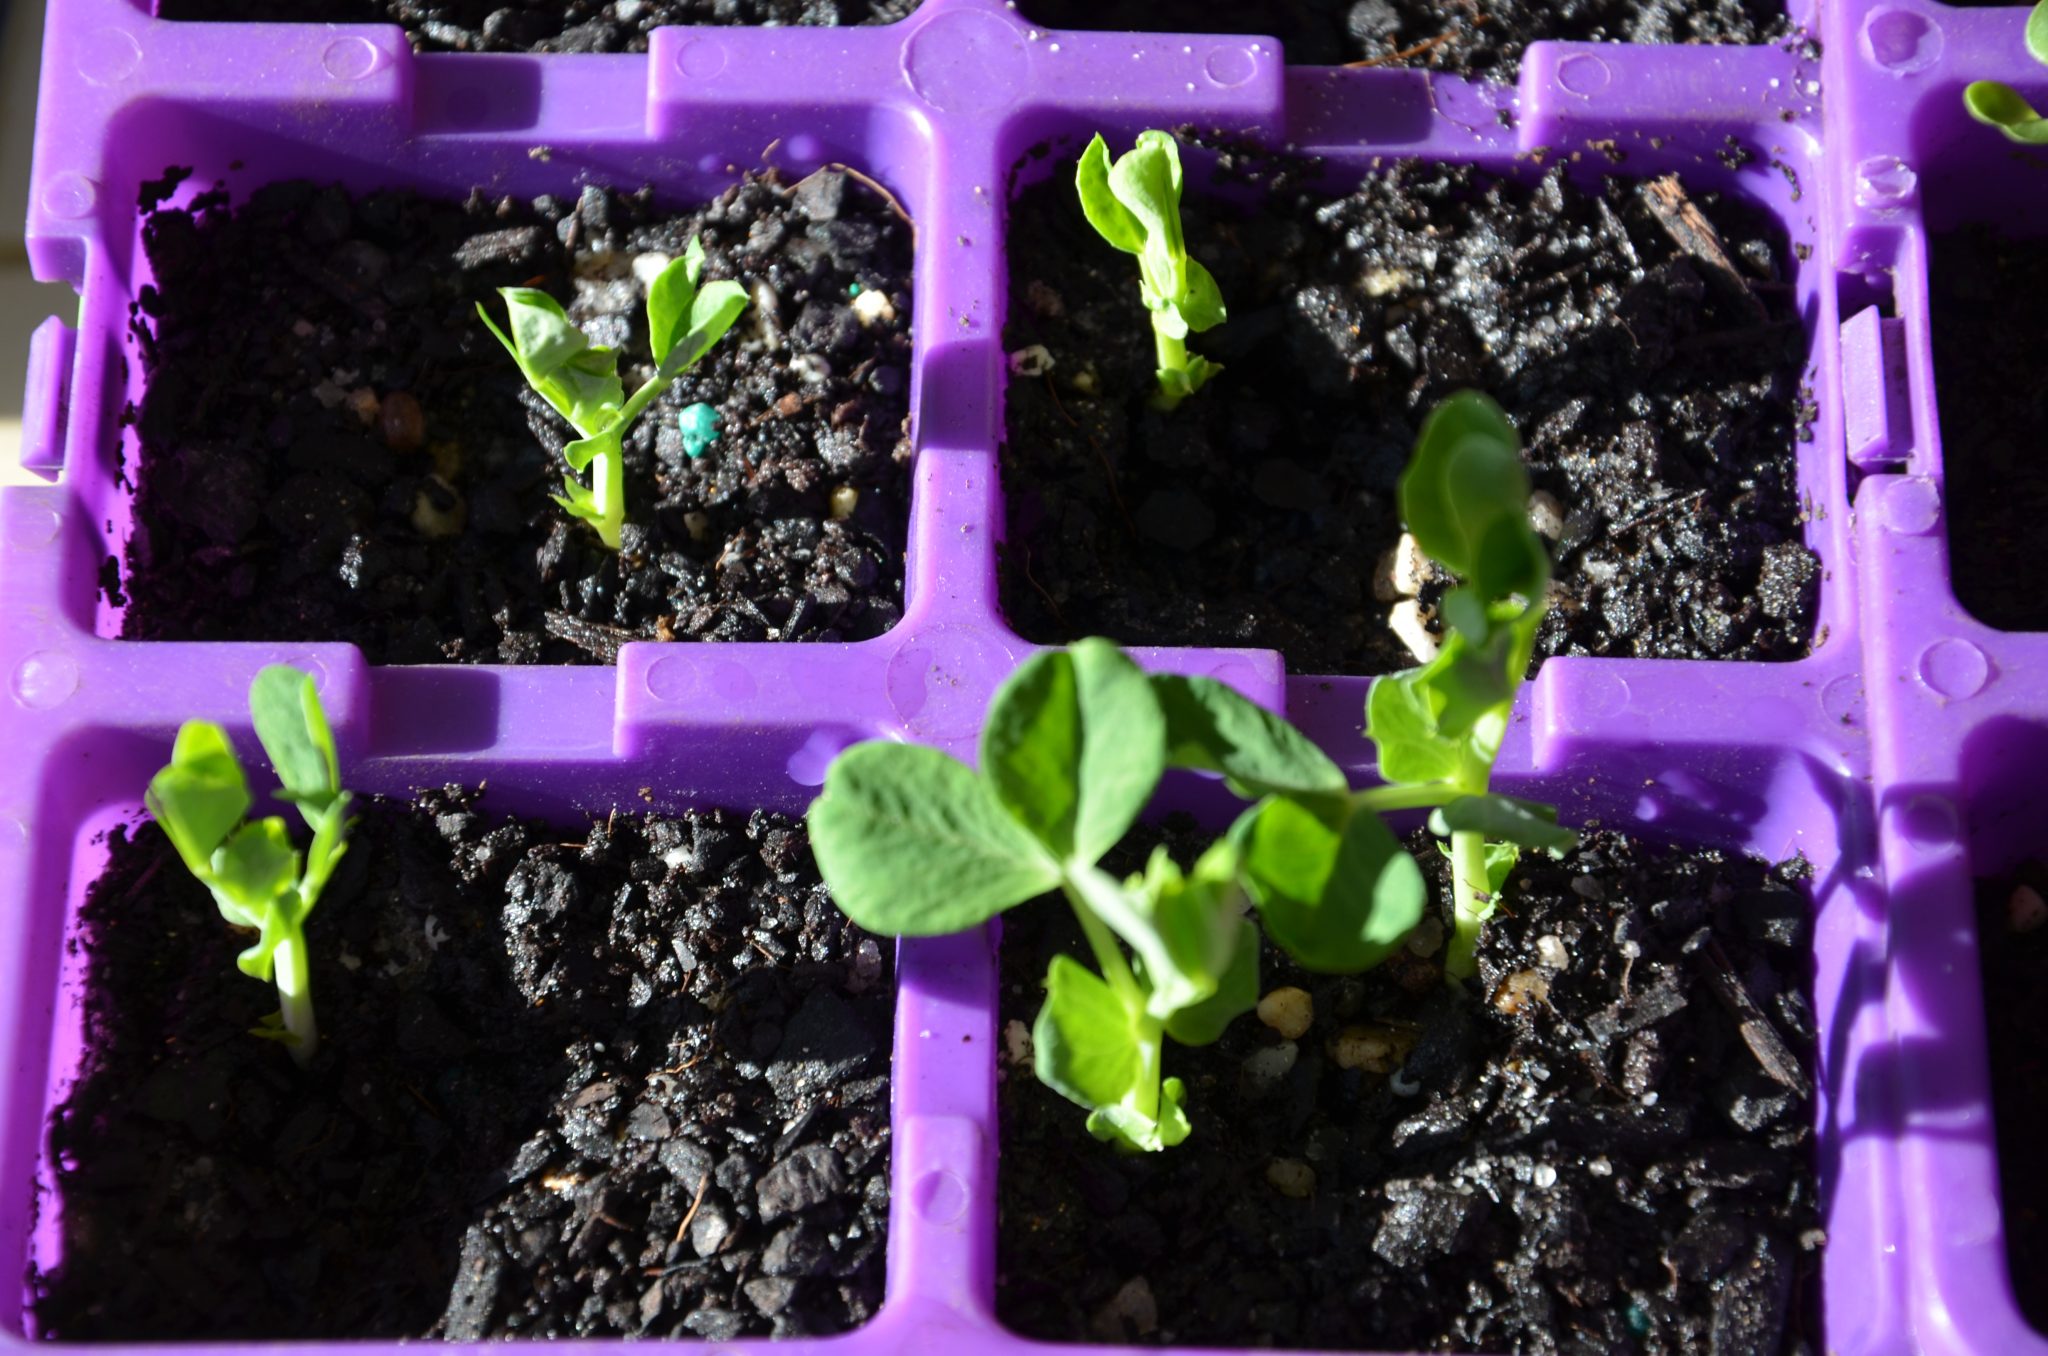
snow peas sown into inividual cells in a punnet

Here in the Southern Highlands with nearly three weeks of frost, some severe, the ground is too cold to be doing and direct seed sowing this week.

So this week I will be planting seeds into punnets of Asian greens, Broccoli, snow peas, English spinach, rocket and coriander.

Now the English spinach, rocket and coriander I would normally sow directing into the ground where I want to grow them as they dislike having their roots disturbed- so they will be sown into individual large cell punnets so they can be transplanted with no, or minimal, disturbance to their root system.

In a more temperate climate direct sowing can still be done.

You might ask, if I am planting all these seeds every week, how big is the area I grow in and how am I going to use all this produce.

Never fear, my garden is not that big and I rarely have excess produce because I practice succession/successive planting

For Broccoli, I will only plant 4-6 broccoli seeds every two weeks, I use tweezers to pick up and plant individuals seeds. Some do not germinate and I will discard any that look weak, so typically I end up with 2-3 plants that I then plant into the garden once they are good strong plants.

This way, in 12-14 weeks’ time I have 2-3 heads of broccoli every 2 weeks which I easily use in my everyday meal preparation but rarely have excessive amounts.
There are also plenty of side shoots from previously harvested plants which are great for soups and stir-fries.

Plant small amounts often for a continual harvest.

I do this with most of my vegetables.

See link for how to do this for snow peas http://www.myproductivebackyard.com.au/autumn/getting-your-snow-peas-in-for-the-early-cropping/

Enjoy the weekend and get out and sow some seed.
Happy Gardening
Kathy

www.home-and-garden-place.com